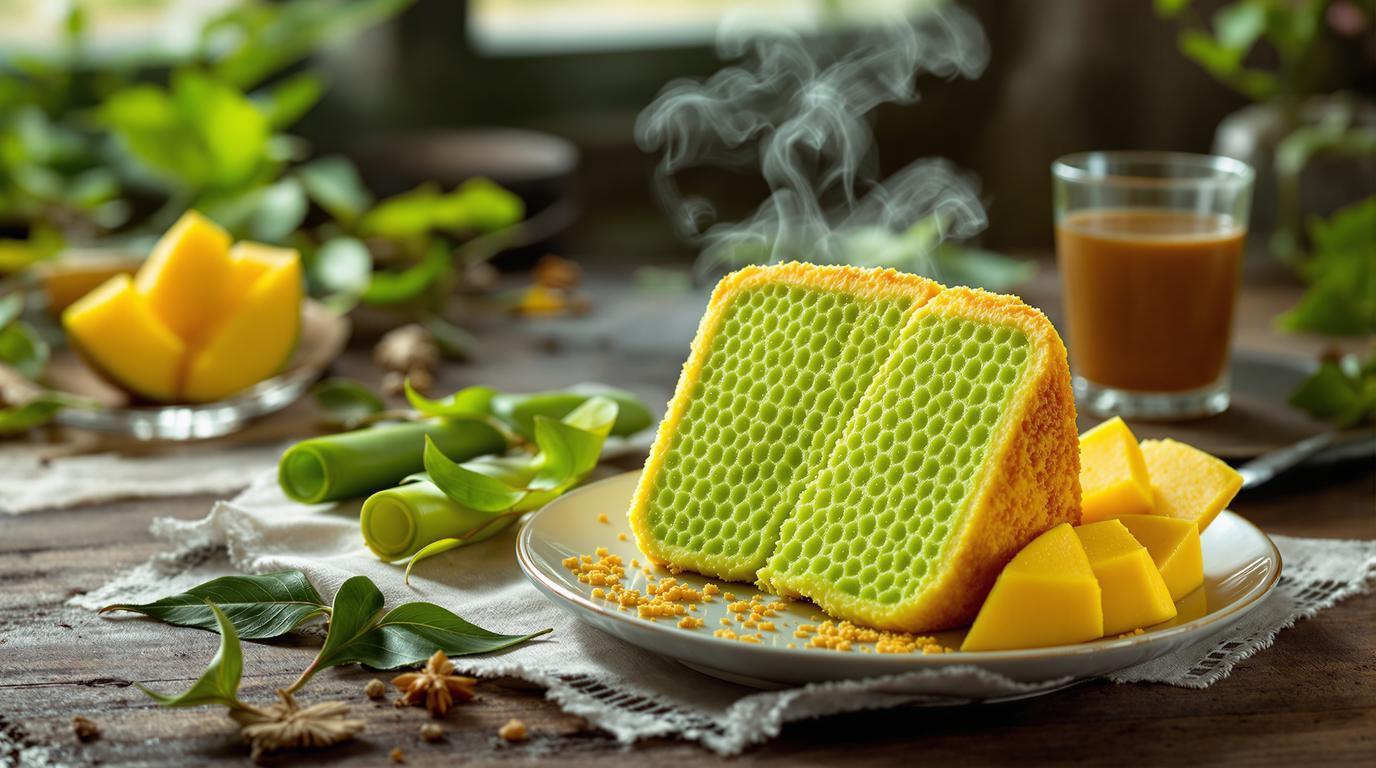
There’s something magical about a cake that creates its own mesmerizing pattern as it bakes. The first time I encountered bánh bò nướng in Vietnam, I was captivated by those perfect honeycomb tunnels running through its springy interior. The subtle fragrance of pandan and coconut milk filled the air as my host sliced into the vibrant green cake. What amazed me most wasn’t just the striking appearance, but how the simplest ingredients transform through a precise technique into something extraordinary. After years of perfecting this recipe in professional kitchens, I’m thrilled to share my foolproof method for creating this enchanting Vietnamese treat at home.
The Story
Honeycomb cake, or bánh bò nướng, holds a special place in Vietnamese cuisine. Unlike many Western cakes that rely on creaming butter and sugar, this gem depends on the chemical reaction between tapioca starch and double-acting baking powder to create its signature structure. During my culinary travels through Southeast Asia, I discovered that nearly every family has their variation – some adding more pandan for color, others adjusting the sweetness. The version I’m sharing today balances traditional techniques with practical adaptations for home kitchens, ensuring those beautiful honeycomb tunnels every time.
Ingredients Spotlight
• 1¼ cups (150g) tapioca starch
• ¾ cup (95g) rice flour
• 1 cup (200g) granulated sugar
• 1½ teaspoons double-acting baking powder (this is non-negotiable!)
• ½ teaspoon cream of tartar
• ¼ teaspoon salt
• 1 cup (240ml) full-fat coconut milk
• 5 large eggs, room temperature
• 1 teaspoon pandan extract (or 1 teaspoon vanilla extract)
• ⅓ cup (80ml) coconut oil, melted and slightly cooled
The tapioca starch is the cornerstone of this recipe – it creates that distinctive chewy texture that makes this cake so addictive. If you’ve ever enjoyed perfectly textured treats, you know how important the right starch can be. Double-acting baking powder is absolutely essential, as it releases carbon dioxide twice – once when mixed with liquid and again when heated – creating those beautiful tunnels throughout the batter.
Step-by-Step Guide
1. Preheat your oven to 350°F (175°C). Lightly grease a 9-inch round cake pan and place it in the oven to warm while you prepare the batter.
2. In a large bowl, whisk together the tapioca starch, rice flour, sugar, baking powder, cream of tartar, and salt until well combined.
3. In a separate bowl, lightly beat the eggs (don’t overbeat – we’re not looking for volume here). Add the coconut milk and pandan extract, mixing until just combined.
4. Gradually pour the wet ingredients into the dry mixture, stirring gently until smooth. Add the melted coconut oil and stir until incorporated.
5. Pour the batter through a fine-mesh sieve into a large measuring cup or bowl with a spout. This step is crucial for removing any lumps that would disrupt the honeycomb formation.
6. Remove the heated pan from the oven and immediately pour in the batter.
7. Gently tap the pan on the counter 2-3 times to release any large air bubbles.
8. Bake for 40-45 minutes without opening the oven door for the first 30 minutes (this is critical for proper rising).
9. The cake is done when a toothpick inserted in the center comes out clean and the top is golden brown.
10. Allow to cool in the pan for 10 minutes before inverting onto a cooling rack.
Expert Techniques
The secret to achieving those perfect honeycomb tunnels lies in three critical steps. First, sieving the batter eliminates lumps that would disrupt the formation of air pockets. Second, preheating the pan creates an immediate rise when the batter hits the hot surface. Finally, maintaining an undisturbed oven environment during the initial baking phase allows the chemical leavening to work its magic. I learned this the hard way during a cooking demonstration in Hanoi – my assistant opened the oven door too early, and our cake collapsed in seconds!
Chef’s Note: If your cake doesn’t develop pronounced honeycomb tunnels on the first try, check your baking powder. Single-acting versions won’t create the same effect. Also, room temperature ingredients are non-negotiable – cold eggs or coconut milk will inhibit proper rising and tunnel formation.
This technique of creating airy structures through precise temperature control is similar to what we do when making perfectly fluffy pancakes, just with different ingredients and chemistry at work.
Presentation & Pairing Ideas
Serve this cake slightly warm or at room temperature. The traditional way is to cut it into wedges, showcasing those beautiful honeycomb tunnels. For a modern twist, I like to serve it alongside a small glass of Vietnamese coffee or jasmine tea. During summer months, a side of fresh mango or lychee complements the subtle sweetness perfectly. This cake also pairs wonderfully with the same bold flavors you might enjoy in a vibrant poke bowl.
For a seasonal variation, add 1 tablespoon of grated ginger to the batter in winter months, or 2 tablespoons of coconut flakes folded in gently during summer. If you’re avoiding refined sugar, you can substitute with coconut sugar, though the color will be darker and the flavor more caramel-like.
The beauty of honeycomb cake is how it teaches us to respect chemical reactions in baking. Once you master this technique, you can apply similar principles to create perfect risotto or slow-cooked stews – it’s all about understanding how ingredients transform under the right conditions. Make this cake your own by experimenting with different extracts or even a light fruit puree swirled through the batter just before baking. The science stays the same, but the possibilities are endless! 🍯🍰✨