There’s something deeply satisfying about homemade granola bars that store-bought versions simply can’t match. During my stint at a small patisserie in southern France, I discovered the perfect balance between chewy and crisp in these chocolate-dipped cereal bars. What makes these bars special isn’t just their rich flavor profile—it’s how the toasting process transforms ordinary oats into something extraordinary. The contrast between the nutty, toasted base and the glossy chocolate coating creates an irresistible texture that keeps you coming back for more. These bars have become my go-to gift for friends and my personal travel companion on culinary adventures.
The Story Behind My Chocolate-Dipped Granola Bars
These granola bars originated as a practical solution for preserving harvest bounty—combining shelf-stable ingredients like oats and nuts with honey as a natural preservative. While commercial versions often sacrifice quality for shelf life, this recipe honors tradition while adding my contemporary twist: a precisely tempered chocolate layer that adds sophistication without overwhelming the nutty foundation.
Ingredients Spotlight
For 6 substantial bars, you’ll need:
- 7 oz (200g) rolled oats (choose thick-cut for superior texture)
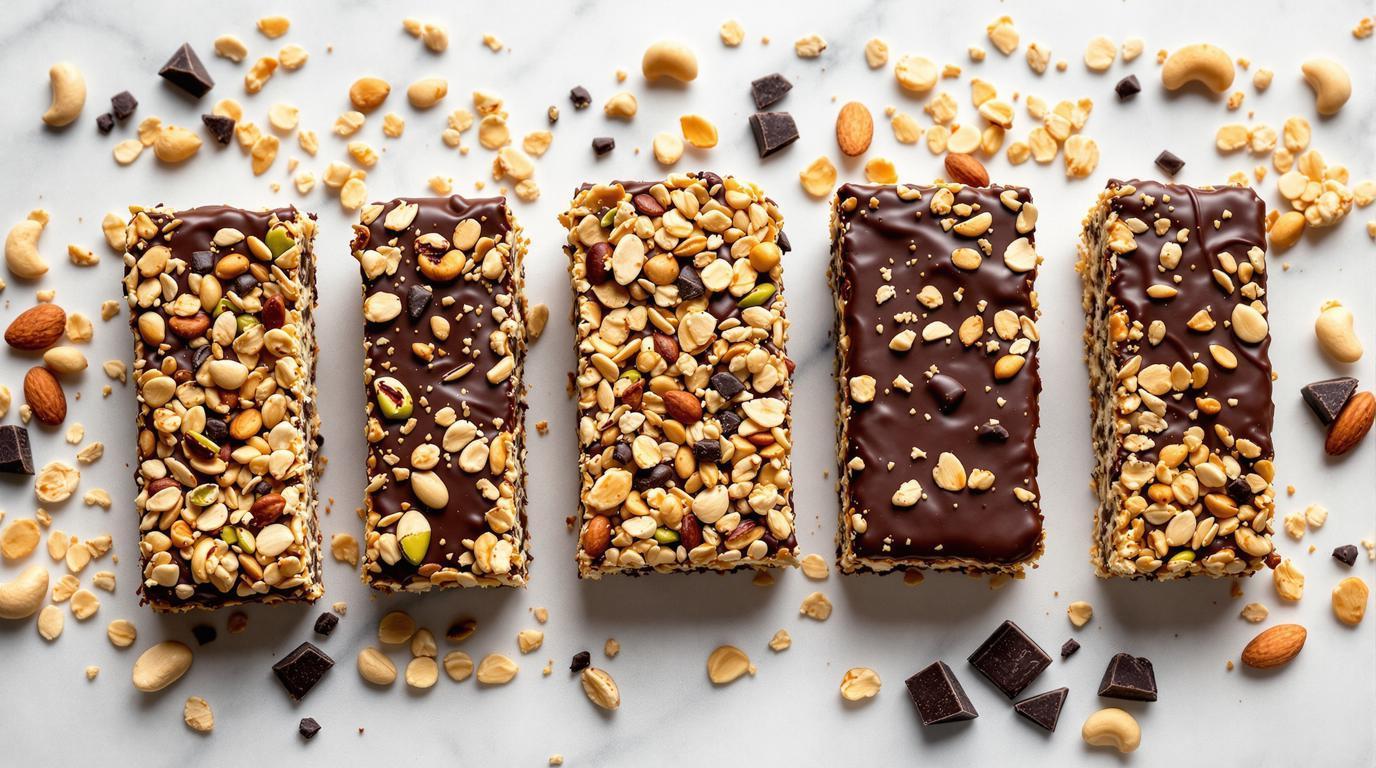
- 5.3 oz (150g) 70% dark chocolate (the high cocoa content creates a sophisticated bitterness)
- 2.8 oz (80g) each of cashews, pistachios, and almonds (this trinity creates textural complexity)
- 5.6 oz (160g) honey (look for a lighter variety that won’t overpower)
- 2.1 oz (60g) unsalted butter (European-style if possible for its higher fat content)
Step-by-Step Guide
1. Prepare your nuts – Roughly chop the cashews, pistachios, and almonds, maintaining irregular pieces for textural interest. This inconsistency is what gives homemade bars their character.
2. Create your base mixture – Combine the oats and chopped nuts in a large bowl. In a small saucepan, gently melt butter and honey together over low heat (about 3-4 minutes) until completely incorporated. Pour this golden mixture over your dry ingredients and fold thoroughly until every oat is coated.
3. Form and bake – Transfer to a buttered rectangular baking dish (approximately 8×10 inches). Here’s the crucial part: press the mixture down firmly using the back of a spatula or your fingers—this compression prevents crumbling later. Bake at 350°F (180°C) for exactly 15 minutes until golden brown at the edges.
4. The chocolate finish – Allow the baked slab to cool completely (about 45 minutes) before turning it out. Meanwhile, melt the chocolate using a double-boiler method. When melted, use a spatula to spread a thin, even layer across the top surface only. Let the chocolate set at room temperature—never refrigerate, as this can cause chocolate bloom.
5. The perfect cut – Once set, use a sharp, hot knife (run under hot water and dried) to slice into 6 even bars. Clean the knife between cuts for professional-looking edges.
Expert Techniques
The key to superior granola bars lies in two critical techniques. First, the honey-butter ratio must be precise—too much creates a sticky mess, too little results in crumbly bars. Second, proper chocolate tempering: melt to 115°F (46°C), cool to 82°F (28°C), then reheat to 89°F (32°C) for that professional snap and shine. For a shortcut method, simply melt 2/3 of your chocolate, then stir in the remaining 1/3 off heat until smooth.
Chef’s Note: When I’m creating these bars for professional events, I add a pinch of flaky sea salt over the still-wet chocolate. This technique, borrowed from my time at a Barcelona chocolate studio, creates a compelling flavor bridge between the sweet honey base and the bittersweet chocolate coating.
Presentation & Pairing Ideas
These versatile bars deserve thoughtful accompaniments. For breakfast, serve alongside a fluffy pancake with fresh berries. For an afternoon pick-me-up, pair with an Earl Grey tea to complement the chocolate notes. For dessert, these bars transform when slightly warmed and served with a scoop of vanilla bean ice cream—the contrast between cold and warm creates a decadent experience reminiscent of upscale restaurant desserts.
For dietary variations, replace honey with rice syrup for a vegan version. Apple compote (about 7 oz/200g) can substitute partially for honey to create a softer texture inspired by French cooking techniques. For gluten-sensitive guests, certified gluten-free oats work perfectly without altering the recipe.
These bars store beautifully for up to one week when wrapped in parchment rather than plastic—allowing them to breathe prevents moisture buildup that would compromise their perfect texture. The technique resembles traditional French pastry preservation methods, where proper air circulation is prioritized.
Make these bars truly your own by experimenting with spice infusions in the honey-butter mixture. A quarter teaspoon of cardamom transforms them into a Scandinavian-inspired treat, while cinnamon and nutmeg create a profile reminiscent of the best New York bakeries. Trust your palate—this recipe isn’t just instructions; it’s the beginning of your own signature creation. 🍫✨