The first time I tackled a croquembouche was after returning from a stint at a patisserie in Lyon. What began as a disaster (imagine caramel threads everywhere but where they should be) evolved into my signature showstopper. This towering French dessert—whose name literally means “crunch in mouth”—transforms simple choux pastry into an architectural marvel that commands attention at any celebration. What surprises most home cooks is that behind its intimidating appearance lies a surprisingly manageable process that just requires patience and precision.
The Story
Croquembouche originated in France during the 1700s as a symbol of abundance at celebrations. While working in Paris, I learned that many French families still commission these towers for weddings instead of traditional cakes. The structure’s conical shape was said to represent prosperity and fertility—practical symbolism aside, I’ve found nothing creates more genuine gasps than carrying one of these golden towers to the table.
What makes this salted caramel version special is how the subtle salt cuts through the sweetness, creating a more complex flavor profile than the traditional version. When I introduced this variation at a food festival in Barcelona, even traditional French pastry chefs were intrigued.
Ingredients Spotlight
The foundation of any great croquembouche is exceptional choux pastry. While choux seems intimidating, it follows predictable principles—proper moisture evaporation creates the steam pocket that gives each puff its signature hollow center.
For the choux pastry:
- 250g (1¾ cups) all-purpose flour
- 250ml (1 cup) water
- 250ml (1 cup) whole milk
- 250g (1 cup + 1 Tbsp) unsalted European-style butter
- 5 large eggs, room temperature
- 1 tsp (5g) salt
- 2 tsp (12g) granulated sugar
For the pastry cream:
- 300ml (1¼ cups) whole milk
- 1 vanilla bean, split and scraped
- 4 large egg yolks
- 80g (⅓ cup) granulated sugar
- 30g (¼ cup) cornstarch
- 20g (1½ Tbsp) unsalted butter (optional)
For the salted caramel:
- 400g (2 cups) granulated sugar
- 200ml (⅘ cup) water
- 1 tsp fleur de sel (or ½ tsp fine sea salt)
Step-by-Step Guide
1. Prepare the choux pastry: Bring water, milk, butter, salt, and sugar to a boil in a heavy saucepan. Once boiling, add all flour at once and stir vigorously with a wooden spoon until the dough forms a smooth ball that pulls away from the sides (about 2 minutes). Transfer to a stand mixer and let cool for 5 minutes.
2. Finish the choux: With the mixer running on medium speed, add eggs one at a time, ensuring each is fully incorporated before adding the next. The finished dough should be glossy and fall from the spatula in a V-shaped ribbon. Transfer to a piping bag fitted with a ½-inch round tip.
3. Bake the puffs: Pipe 1½-inch rounds onto parchment-lined baking sheets, spacing them 2 inches apart. Smooth any peaks with a dampened finger. Bake at 425°F (220°C) for 10 minutes, then reduce to 375°F (190°C) for another 15 minutes until deeply golden. Pierce each puff with a small knife to release steam, then cool completely.
4. Prepare the pastry cream: Heat milk with vanilla bean until steaming. Meanwhile, whisk egg yolks, sugar, and cornstarch until pale. Gradually pour hot milk into egg mixture while whisking. Return mixture to saucepan and cook over medium heat, whisking constantly until thickened. Stir in butter if using. Strain, cover surface with plastic wrap, and chill completely.
Chef’s Note: The pastry cream can be made a day ahead, but choux pastry is best baked the same day you assemble. If you must prepare in advance, slightly underbake the puffs, then reheat at 350°F (175°C) for 5 minutes before filling to restore crispness.
5. Fill the puffs: Transfer pastry cream to a piping bag fitted with a small round tip. Pierce the bottom of each puff and pipe in filling until just full—overfilling will cause them to become soggy.
6. Make the caramel: In a heavy saucepan, combine sugar and water. Heat without stirring until mixture reaches 350°F (175°C) and turns amber. Remove from heat and carefully stir in salt.
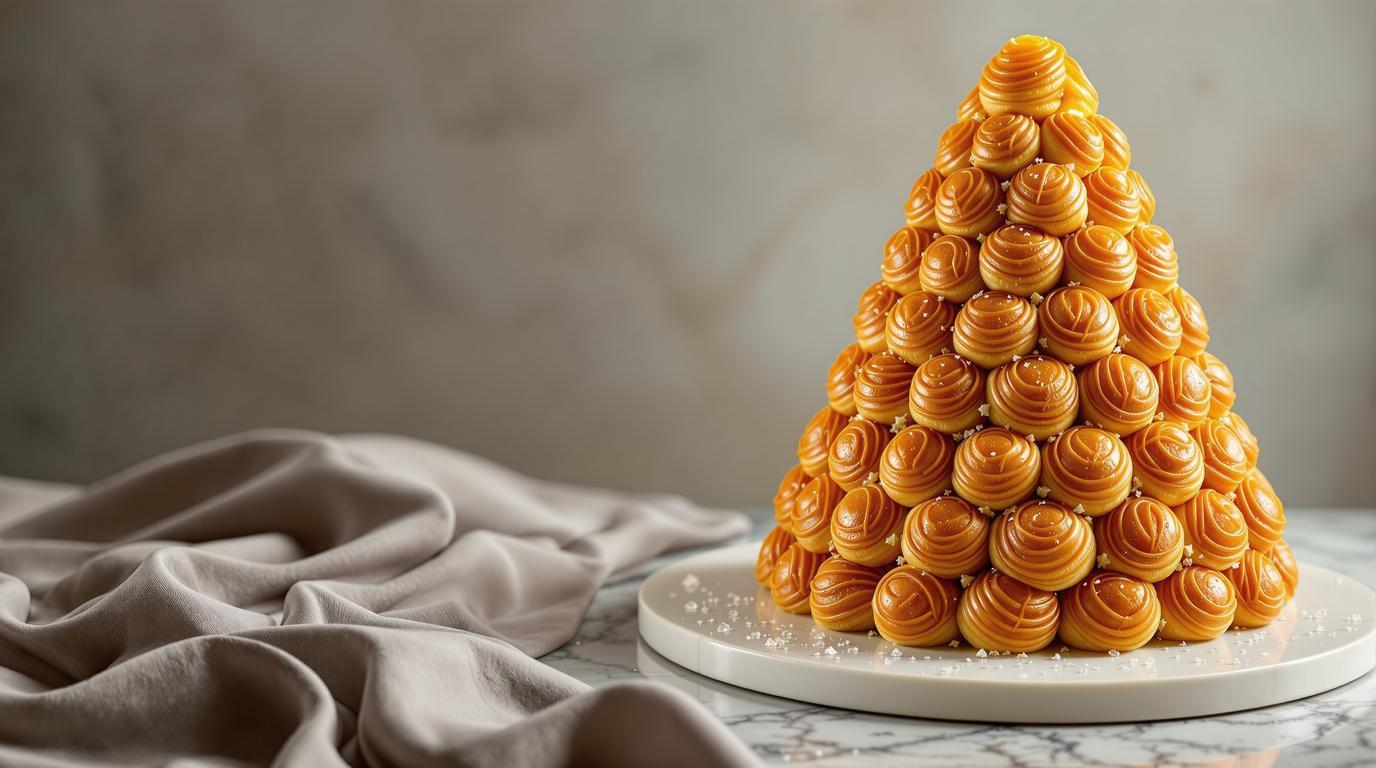
7. Assemble the croquembouche: Dip the bottom of each puff into caramel and arrange in a circle on a serving platter or around a cone mold. Continue building upward in decreasing circles. For structural integrity, occasionally dip sides of puffs to create stronger bonds between layers.
Expert Techniques
The professional touch comes from working quickly with the caramel while maintaining the right temperature. When I’m building a croquembouche for special occasions, I keep the caramel at around 320°F (160°C)—hot enough to remain fluid but not so hot it burns your fingers when working.
For the spun sugar decoration, dip a fork in the remaining caramel and quickly wave it back and forth over the structure to create delicate threads. This technique takes practice, but even imperfect results look impressively professional.
If making this for a dinner party, consider the approach used in traditional Italian cooking—preparation in stages. Make components ahead and assemble within two hours of serving for the perfect balance of structure and freshness.
Presentation & Pairing Ideas
A croquembouche deserves dramatic presentation. Carry it to the table intact, then provide guests with small dessert forks to pluck puffs from the structure—the interactive experience is part of the joy. For a complementary flavor pairing that mirrors the sophistication found in Provençal cuisine, serve alongside a glass of Sauternes or Muscat de Beaumes-de-Venise.
For a stunning seasonal variation, incorporate elements from regional French cooking by infusing your pastry cream with saffron in summer, chestnut in fall, or blood orange in winter. For a more substantial menu, consider balancing this sweet finale with a savory seafood pasta as a main course.
Remember, the beauty of the croquembouche lies in its imperfections—each one tells the story of its creation. Make it your own by adding edible flowers, gold leaf, or even a subtle drizzle of dark chocolate for contrast against the golden caramel. The tower may look intimidating, but breaking through that caramel shell to find the delicate cream-filled puff inside is what makes this dessert unforgettable. Embrace the process—it’s meant to be as enjoyable as the result.